I have wanted a slide scanner for a long time now. I knew that my mom had a stack of slide carousels, languishing in a back closet and I was dying to see what they contained. When I was visiting her this past summer, I emptied the carousels and took all of the slides home with me – where they languished in the back of my closet for a few months. I then decided that a slide scanner was what I was getting for Christmas. And I got it early, because I couldn’t wait.
I looked around a bit on Amazon and decided on the Wolverine F2D. Sounds like a weapon instead of a piece of photographic equipment, doesn’t it? There were some that were more expensive (and possibly of better quality) but in my opinion I didn’t need the top of the line. I don’t have an infinite number of slides to copy. I have one grocery bag full of them and when I’m done with them, the scanner will probably only be brought out when I want to make copies from negatives once in a while. The Wolverine was on sale ($80 when I bought it) and seemed to be both in the price range and quality range I was looking for.
When I opened the box, I was quite surprised at how small and lightweight it was. In the box was: the scanner, cord for the wall (which doubles as a USB cord for the computer, a tray for slides, a tray for 35mm film, and a small brush.

I plugged it right in and loaded the tray with slides. I was up and scanning in a couple of minutes. The controls were very simple and easy to understand. It was all very straight forward and I like that.
I think what I like about it the most is that it is stand alone. It has its own screen and you don’t have to have it plugged into the computer at all. There are a couple of adjustment buttons that you can push while scanning – to change the exposure/lighting. Other than that, it’s pretty much the push of a button and it’s scanned – immediately. No waiting around like I do when I scan an image on my large printer/scanner/copier.
The scanner has its own internal memory, but it only holds 13-14 pictures at a time. You can put an SD card in it if you have one (I didn’t since my camera takes xD, so I’ve been going back and forth uploading the pics onto my computer). If I had a huge number of slides/negatives then I would probably purchase one to make my scanning sessions more enjoyable.
I’m still getting the hang of scanning. I’m a ditz. It seems like about 75% of everything I scan ends up being backwards. I guess I just can’t seem to figure out which is the “right” way on the few different types of slides that my mom used.
Almost all of the pictures had a small black line on one or two sides of them. It just took a quick easy crop to get them out and then for the most part they were fine. There were a few that were blurry(the one below is), but I think that some of the pictures were just plain out of focus. Oh the days before digital photography, auto focus, and the wonderful delete button!
Here is an example of the black line on the side and bottom of this picture. (this is me in our half-built house):

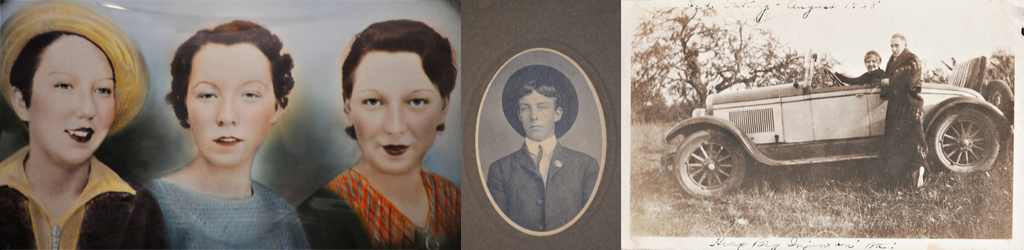
After scanning about half of the slides, I decided to try out some negatives too. The stack of negatives that I was dying to see transformed into pictures were not 35mm film though. I thought I’d give it a try to see if I could make it work anyway. The negatives fit exactly into the slot, but they only scanned the middle area of the negative, so I could only get the middle of the picture. I was happy with what I was able to get from it though – I mean really, it wasn’t designed for that type of film, so it’s not like I could expect perfection.
I love the envelopes that these negatives were in. This one was dated 1941:

I noticed that the pictures I made from the negatives had a lot more “fuzz” on them than the slides. The negatives were from the 30’s and 40’s though and had been sitting in envelopes along with pictures that had been handled a bit. I need to take the time to clean them off properly before scanning again so that I can get clearer images. Here you can see some of the spots on the picture.
![]()
All in all though I was impressed with the scanner for the price I paid.